
outdoor living


Spending time outdoors is something I have loved since I’ve been a little kid, and as I’ve grown up I have taken every available opportunity to stay connected to the outdoors. Even living in a city environment I have always found places to live where I could incorporate an outdoor space; the one main difference being that they have all been roof decks. Here at the Stone House I was really excited to stretch my creativity and skill set to create 3 distinct hardscapes: the entry patio, the triangle patio, and the main patio…
entry patio
The idea here was a simple one: how do track as little mud, snow, elements into our home as possible, and provide an entry that will translate to the rest of the exterior design. The answer was to create a hardscape patio that went from house to barn to driveway and utilize the same materials and design concept as the other two patios. I utilized Techo-Bloc pavers for the entire project, and I have to say I am thrilled with them. It was my first experience working with them, but I have always known them as a top quality name in the industry and I can certainly confirm that now. I used a mix of their Villagio and Blue Grande Smooth to create the patterns you see in the above photos.
triangle patio
Before we get to the triangle patio, I utilized Techo-Bloc’s Boriallias stepping stones, which look just like tree trunks cut in section, and laid them flush to the top of the grass so that guests going to the barn have a clean way of getting there in inclement weather.
The triangle patio itself, gives our Airbnb guests a great place to have a fire pit in the Cowboy Cauldron fire bowl and hang out on the Polywood Modern Adirondack chairs, while listening to the creek flow by. I also added two Polywood rocking chairs on the deck along with a small high top table and 2 stools for morning coffee or a simple dinner on the grill.
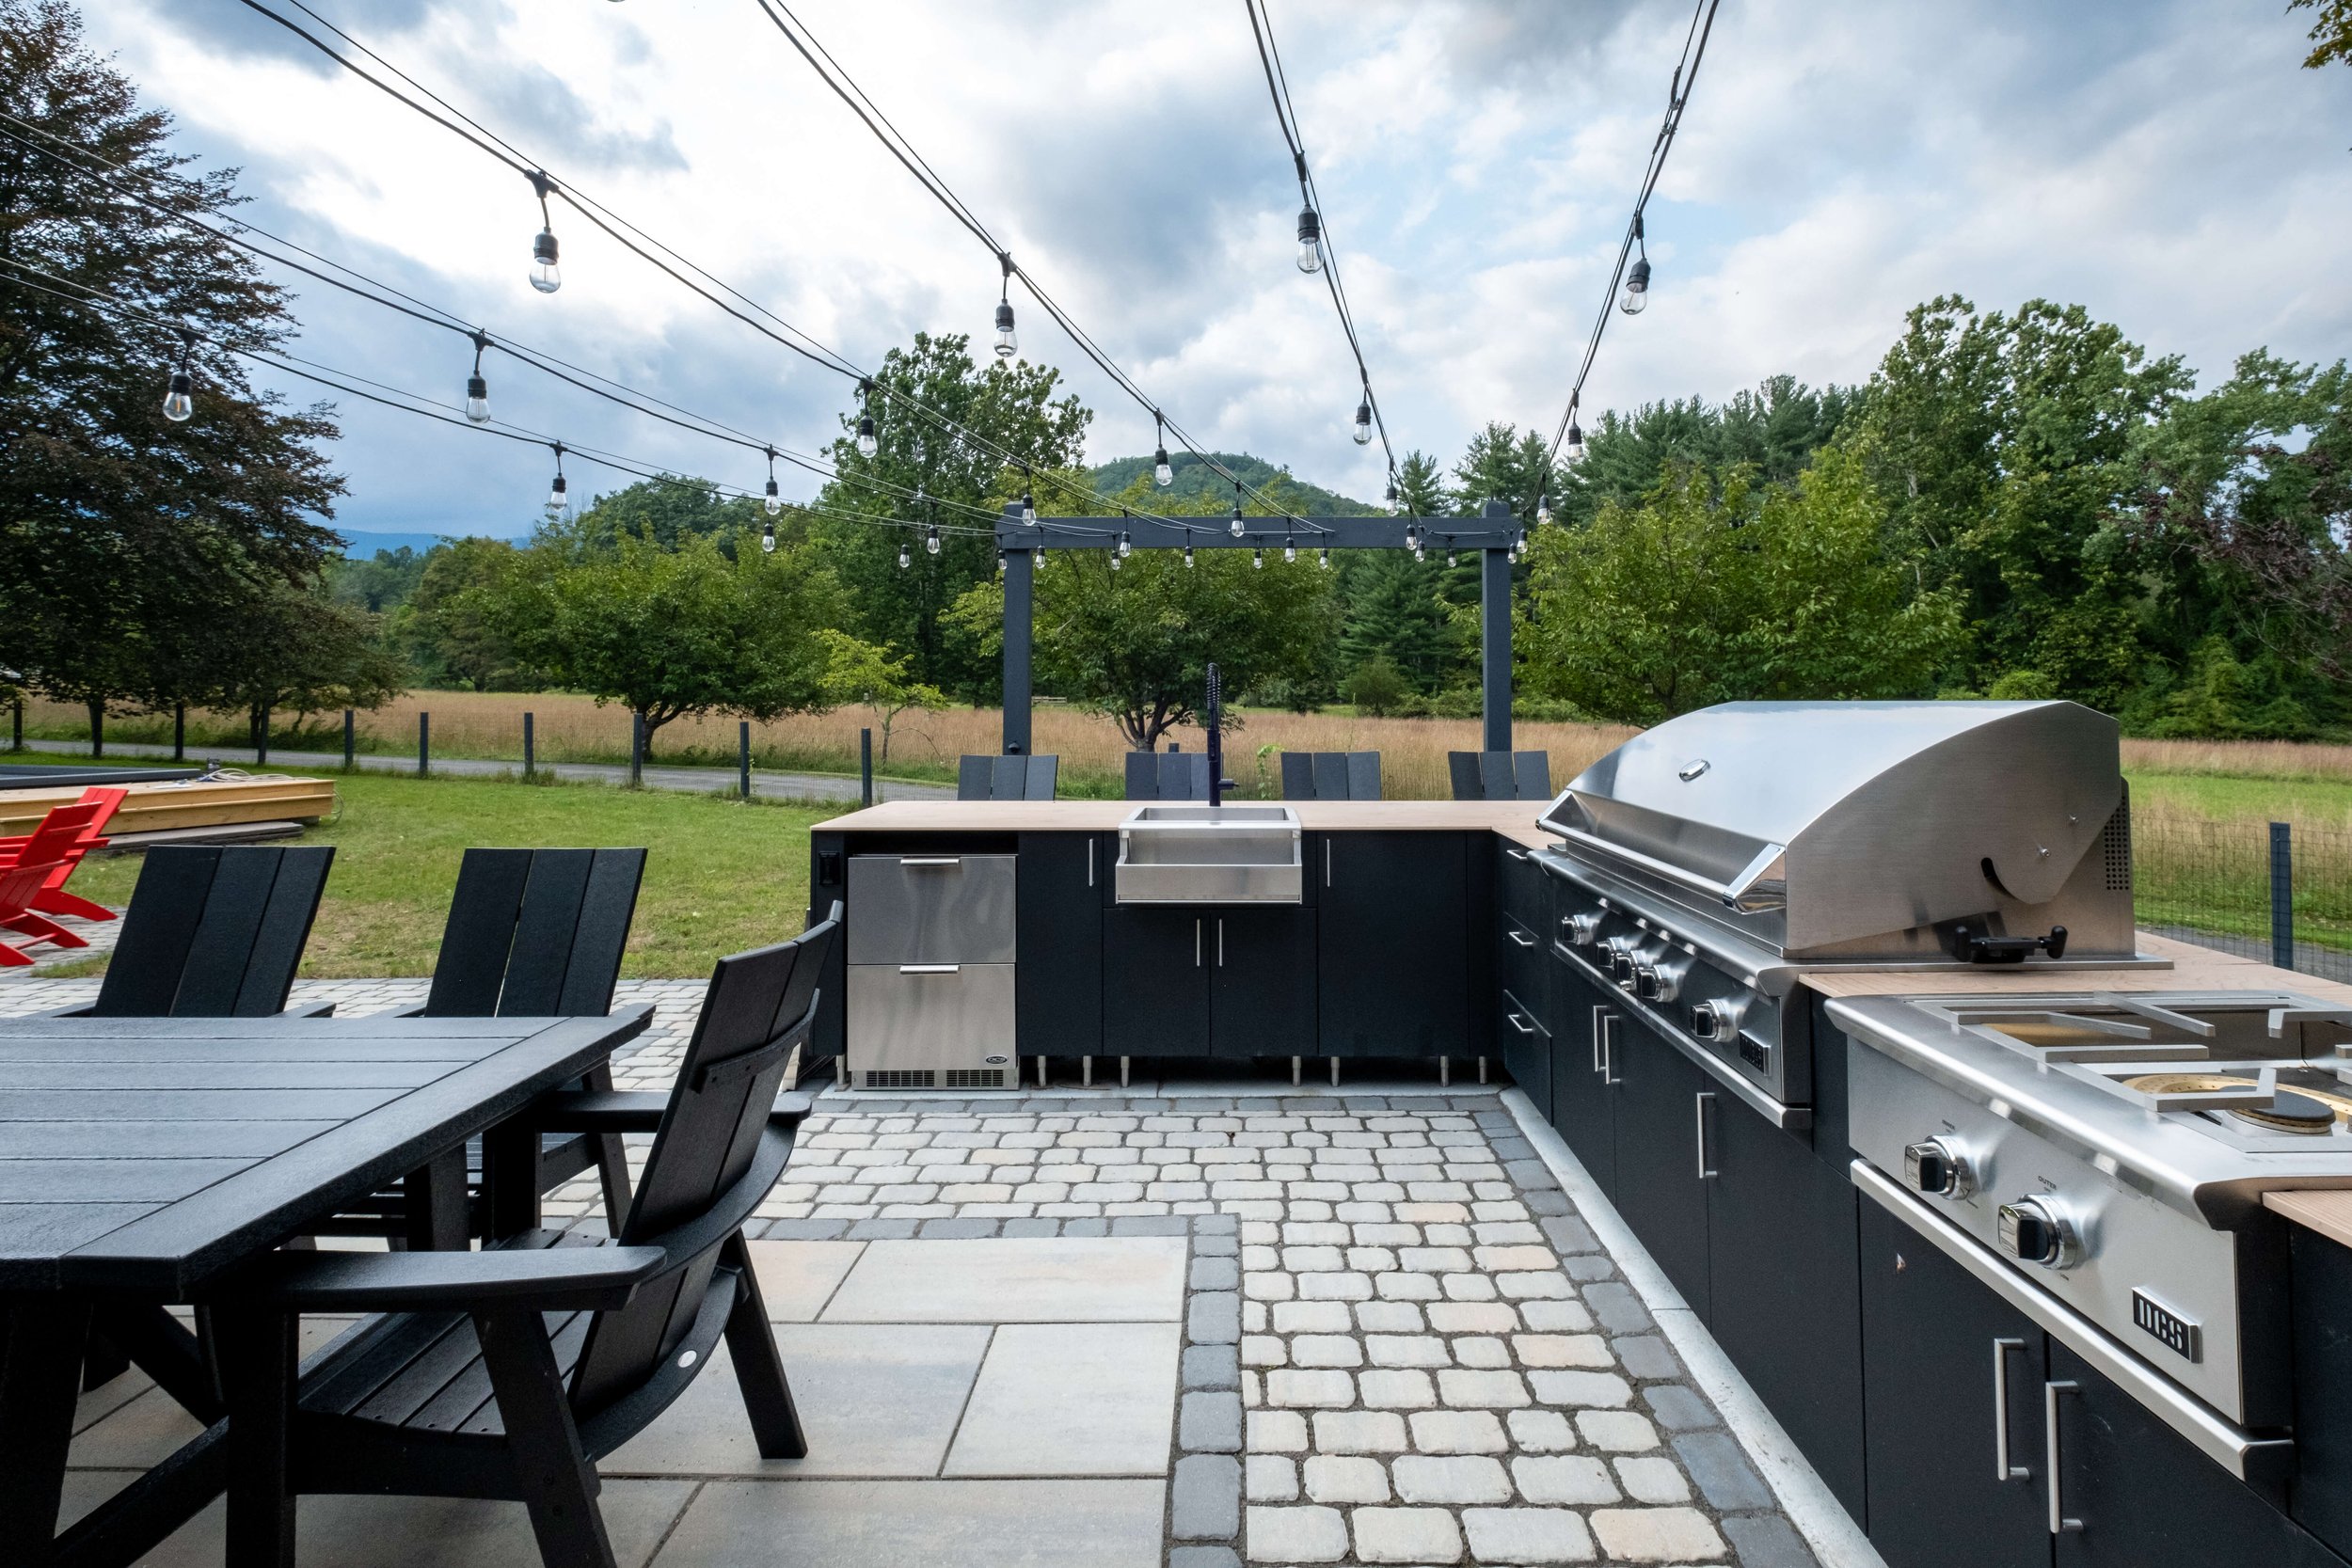
the main patio
This is where all the design started, which I then translated to the other two patios on the property, and is a good note for others looking to create connectivity between separate outdoor spaces…start with the main space. Start with the thing you are most excited about; is most important to you, and work from there. So that is exactly what I did, and the first part of making this patio come together was to understand what kind of opening I could cut in the stone facade of my house. I called my friends at Renewal by Andersen straight away, sent them some photos with dimensions and started talking about the possibilities. At the same time, John Whritner introduced me to his structural engineer and I started having a lot of the same ‘what are the possibilities’ conversations with him. As I have said many times: anything is possible in construction, its all a factor of time and money. So the short version here is that the engineer said we could avoid jumping up to steel supports if I stayed under 18’ in width, and RbA has a Gorgeous 16’ double slider, so that is what I went with. I got the rough dimensions, figured out where I wanted to place the door in the wall, and then I was able to layout the patio to ensure we had great symmetry. In truth, the exterior facade dictated more of the patio layout than the door location did, but that was not a foregone conclusion in all cases, so I like to start with the complicated pieces first so I can adjust the things that are more easily adjusted after the complicated stuff is done.
I wound up designing a 30’ wide X 22’ deep patio with a 15’ diameter fire pit circle complete with a set of 3 fire pit swings, which is something I have had in my design notebook for over a decade and was finally able to see it come to fruition on this project.
The kitchen, my second with Urban Bonfire…well second for me, I have spec’ed at least 10 of these kitchens for clients and friends since installing at the Firehouse because these guys are the best. Period. End of Story. Hands Down. I did a 17’ main run, which houses an epic 48” grill and 24” power burner (70,000 BTUs!) from DCS and enough extra counter space for my mini-Kamado Joe smoker or Gozney Roccbox Pizza Oven, which tucks nicely into a cabinet when not in use. The short run is about 8’ and I utilized DCS’ chiller sink and double drawer outdoor refrigerator along with Kohler’s Purist Semi-Professional faucet in matte black to match the awesome Onyx finish on the Urban Bonfire cabinets. Now in this particular install I have opted to NOT use the toe kicks for the cabinets, as we have a lot of critters running around the yard and leaves coming down off the trees, so I find it easier to keep the underside of the cabinets clean by leaving the toe kicks off and being able to hit it with my backpack blower.
Moving to surfaces, I continued with Neolith, as I did in the kitchen and bar areas of the home. This time utilizing their beautiful wood look stone that can, and usually is, mistaken for real wood! The freeze / thaw and UV stability here is everything - I don’t need to worry about this surface no matter what Mother Nature has up here sleeve.
Now let’s talk furniture…I wanted to go with something that was not only aesthetically appropriate for the space, but it also had to be able to stand up to the elements, and be very low maintenance, as I am not looking to spend my weekend time up here constantly doing upkeep. And all of that is found in the selection of Polywood furniture I selected. Matter of fact, my first set of Polywood was 10 years old when I gifted it to friends for continued use in their backyard only because the colors didn’t work with the new design, which is to say this stuff LASTS! And I leave it out all year long, so the durability is seriously impressive. I also love that they work with Sunbrella for their fabrics, as they are the only brand of outdoor fabric that actually stands up to the elements. And one of the best things about Polywood is that it is 100% recycled and made right here in the USA. I have linked a video about their production process on their product page…its worth a watch!
From the furniture we move out to the pool…the 8’x20’ shipping container pool by Tangle Pools. Those that have been following my work for some time know my obsession with all things shipping containers, so when I found Tangle I contacted them immediately. I knew some companies have been working on pools for a little while now, but being as they are new I wanted to make sure I did my due diligence here…I spoke to a few different companies, and in the end I felt like Tangle really paid attention to the details and from what I could tell their build quality was on point. And thankfully I was right, you could tell immediately upon delivery that it was solid and well built. The beauty of having all of the mechanicals installed under the stairs is that you don’t have to have a separate pool sub-contractor on site with everything else that was going on on the job site. So I was able to run my propane and electric trenches to the proper locations and then have the connections completed once the pool was in place. After having this pool for an entire summer, I have to say I’m very pleased with my decision, I love how efficiently the pool runs, and its the perfect spot to cool off on those hot summer days without a ton of maintenance. I’ll be doing a Spring pool opening vlog next Spring (2022) so I’ll report back then on the rebalancing, how the coating is standing up.